How we do it?
To be able to get exactly what you want, one does not have to be a printing expert, but some basic understanding of the process of custom printing can be very valuable. The problem is, that most people do not care much about this and then they might be dissapointed with the results.
Long story short, there are several ways to print your stuff neither of which is THE best for every order. Each method has its pros and cons. Here you can read a brief description of each method we use:
Screen Printing
How it's done
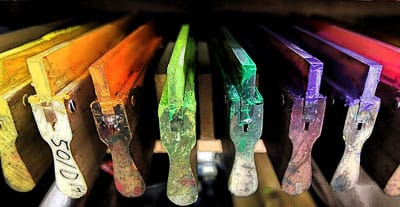 Screen printing is arguably the most widely used t-shirt printing method. Most printing you see in shops will probably have been printed this way. It is the process of pushing ink through a porous mesh screen stretched tightly over a metal frame.
The process is a bit more complicated than with DTG printing and it requires much more equipment. For each color in a design, piece of film that will become an individual screen is produced (which itself requires a few steps to do it). Then the screen is placed on top of the garment and, using just the right amount of pressure, a squeegee is dragged across the screen, causing the ink to pass through the stenciled part of the mesh. This process is repeated separately for every color in the design. When all the colors are printed, the garment is sent through a drying oven or curing system.

Pros
- It is a great process for larger orders (and larger designs) - the more you order the less you pay for each garment.
- Screen printing can produce more vibrant and accurate colors than other methods.
- Screen printed garments wash well, withstand far more stress than other printing methods and can maintain the print quality and vibrant colors for a very long time.
Cons
- Preparing screens is the most expensive part of the job, so it is not economical to do small quantities of prints.
- The overall cost depends on the number of colors to be printed on the garment (The price rises with every color).
- The process does not allow smooth gradients, so you have to know how to make a vector gradient in the design graphics.
Digital Printing
How it's done
 The digital printing is also sometimes called the direct to garment (DTG) printing. The name is quite self-explanatory - basically, the ink gets injected directly into the material. To be able to do it, you have to have a special DTG printer. This machine looks like a (usually very big) office printer, that prints on a paper and you probably have it at home, except DTG printer works on fabric.
The process itself is quite easy and fast to set up. First you have to pre-treat the garment (dark garments have to be treated with a kind of spray primer), then you load the garment in the DTG printer which injects color pigments into the fibers. This is the reason, why the feel of the final print is very soft to the touch. When the printer is done, the printed garment must be heat pressed to cure for between 1 and 3 minutes.

Pros
- The design is not limited in the terms of color number (DTG printers can print a full color spectrum) and can include gradients.
- The design can be very complex with a lot of tiny details.
- There is no minimum amount of garments required for the order.
Cons
- Because DTG printers use water-based inks, it is not compatible with polyester garments or other types of materials that repel liquid.
- For the same reason as in #1, DTG printed colors tend to fade away a bit with time. On the other hand, this is exactly why is this method so popular when creating a vintage-looking garments.
- This price does not decrease with the size of the order, so it is not the most cost effective for the bulk orders.
Vinyl Cut Printing
How it's done
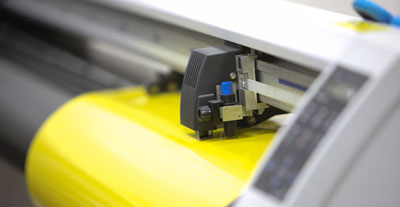 Vinyl printing involves a sharp computer-controlled blade which digitally cuts the design out of a special vinyl material which is then transferred to a garment using a high pressure and temperature.
The process is simple - the artwork is cut out on the vinyl at the cutter, then the unwanted vinyl is taken away. This is called weeding and can be very time consuming and delicate if the design has a lot of details detail.
Once the weeding has been done we are left with the design on its backing paper that is then transferred onto the garment. This is done by an industrial heat press that allows us to apply high pressure and temperature over 160 °C. Once this has been applied the backing paper is removed.

Pros
- This method is great and the most cost-effective for personalizing names and numbers.
- Vinyl comes in a wide variety of formats, such as most of all basic colors, metallic, fluorescent, flock and reflective colors.
- With proper treatment it can be as durable as screen printing and has no color fading over time.
Cons
- The weeding process can be very time consuming and delicate. Some small details are even impossible to be done.
- Although you can have more than one color in the design (usually not more than 3 though), we would strongly do not recommend it.